A Deep Dive into API Rate Limiting with Django Throttle

Let's say you're hosting a party at your house, and you have a limited amount of snacks and drinks to serve your guests. You want to make sure that everyone gets a fair share of the refreshments, and that no one person consumes all of the resources.
To achieve this, you decide to serve each guest one drink and two snacks every hour. This will ensure that everyone has enough refreshments to enjoy, without allowing any one person to consume too much.
This is similar to the concept of rate limiting in the digital world. Just like how you manage your snack resource at the party, similarly, rate limiting in technology refers to limiting the number of requests a server can handle in a specific timeframe to prevent overwhelming traffic and potential crashes.
Objectives
By the end of this article, we should learn the following:
What is Rate limiting
Different types of rate limiting
Pros and Cons of Rate Limiting
How to implement rate limiting in Django REST
Security Limitations of Rate Limiting
What is Rate Limiting?
Rate limiting is a crucial technique used to regulate traffic flow on an API and prevent it from becoming overloaded or underperforming. Its primary goal is to avoid abuse or overloading of the API, which can lead to performance issues for users. By limiting the number of requests per second (RPS), rate limiting helps ensure fair usage, reduces attacks such as botnets or denial of service (DoS), prevents data scraping, and enforces API usage limits for billing and security purposes.
When implementing rate limiting, API developers typically set a maximum number of requests allowed per minute. If a user exceeds this limit, the API returns a 429 status code error, indicating "Too Many Requests." This notification informs the user that they have sent too many requests within the allocated time frame and needs to wait before sending more.
Types of rate limiting
Rate limiting can be used by defining different parameters based on the objectives and level of restriction desired. In this article, we will explore some of the most common types of rate limiting.
Fixed Window Rate Limiting
Fixed window rate limiting is the most straightforward approach to rate limiting. In this method, a fixed number of requests or actions are allowed within a specified time window (a specific time interval during which a fixed number of requests or actions are allowed). For example, if a service allows a maximum of 10 requests per minute, then any requests beyond that limit will be rejected or delayed until the next time window. This approach is easy to implement but can be problematic if requests are not evenly distributed throughout the time window.
Token Bucket Rate Limiting
Token bucket rate limiting is a popular method used to control the rate of traffic in a network or application. In this method, tokens are added to a bucket at a fixed rate, and requests or actions are only allowed when there are tokens available in the bucket. When a request is made, a token is removed from the bucket. If there are no tokens left, then the request is rejected or delayed. This approach allows for bursts of traffic to be processed, as long as the overall rate does not exceed the limit.
Leaky Bucket Rate Limiting
Leaky bucket rate limiting is similar to token bucket rate limiting, but instead of tokens being added at a fixed rate, the bucket is filled with a fixed amount of tokens and leaks out at a fixed rate. In this method, requests or actions are only allowed when there are tokens available in the bucket. If the bucket is empty, then the request is rejected or delayed. This approach effectively controls the traffic rate but can be less flexible than token bucket rate limiting.
Pros and Cons of Rate Limiting
Here are some pros and cons of rate limiting:
Pros:
Prevents overloading: By limiting the number of requests, rate limiting prevents overloading of the system or API and ensures its stability and reliability.
Enhances security: Rate limiting can be used to prevent or mitigate DDoS attacks by limiting the number of requests from a single IP address or user.
Controls costs: By limiting the amount of traffic or requests, rate limiting can help control infrastructure costs, especially in cloud-based environments where usage-based billing is common.
Provides fair usage: Rate limiting ensures that all users or clients have equal access to resources, preventing a few users from consuming all available resources.
Cons:
Can limit legitimate usage: Overzealous rate limiting can prevent legitimate users from accessing resources or using an API, resulting in a poor user experience.
Can be complex to implement: Implementing rate limiting can be complex, requiring careful consideration of factors such as user behaviour, traffic patterns, and resource utilization.
May require frequent adjustment: Rate-limiting policies may need to be frequently adjusted to accommodate changing traffic patterns, user behaviour, or resource utilization.
May affect performance: Rate limiting can add overhead to processing requests, potentially affecting the performance of the system or API.
Implementing API Rate Limiting with Django
Rate limiting is a critical aspect of API development, as it helps to prevent abuse and ensure fair usage of resources. In Django, rate limiting can be implemented using middleware, decorators, or third-party libraries, depending on the specific needs of your application.
One popular library for rate limiting in Django is Django Throttle, which provides decorators for rate limiting based on an IP address or custom keys.
Throttling with Django REST Framework
Django REST Framework has a throttling feature for executing rate-limiting functionality for Django applications. It uses Django's cache framework to store rate-limiting information and provides decorators for rate-limiting based on an IP address or custom keys. Flexibility is one of the cool features throttling has in DRF as it provides the ability to implement multiple throttles to control requests made by either an authenticated or anonymous user.
Now let’s create an API and set our throttle policies.
Project setup
Make sure you have Django installed on your machine. Create a folder, this is where we will install our Django project. Open your folder in your code IDE and run the below command:
$ pip install djangorestframework
$ django-admin startproject rate_limiting
$ cd rate_limiting
$ python manage.py startapp restaurantapp
From the code above, we installed the Django rest framework library and created a Django project and a Django app named restaurantapp.
Now let’s add the new app and rest_framework to the list of installed apps in settings.py and create a urls.py file for the app.
INSTALLED_APPS = [
    'django.contrib.admin',
    'django.contrib.auth',
    'django.contrib.contenttypes',
    'django.contrib.sessions',
    'django.contrib.messages',
    'django.contrib.staticfiles',
    'rest_framework',
    'rest_framework.authtoken',
    'restaurantapp',
]
We will be having two urls.py files, one will be included in the project’s directory while the other in the restaurantapp folder. Let’s create a new urls.py in the app’s directory and include it in the project’s own.
from django.contrib import admin
from django.urls import path, include

urlpatterns = [
path('admin/', admin.site.urls),
path('restaurant/', include('restaurantapp.urls')),
]
In the app’s urls.py file, add the following code:
from django.urls import path

urlpatterns = [
]
Creating models
In models.py, add the following:
from django.db import models

class Snacks(models.Model):
name = models.CharField(max_length=50)
price = models.DecimalField(decimal_places=2, max_digits=5)
In the code block above, we created a new class named Snacks by inheriting Django’s model class, afterwards, we then created the class attributes named name, and price which map as database columns in our table.
Now, let’s makemigrations and then migrate our table into our database with the command below:
$ python manage.py makemigrations
$ python manage.py migrate
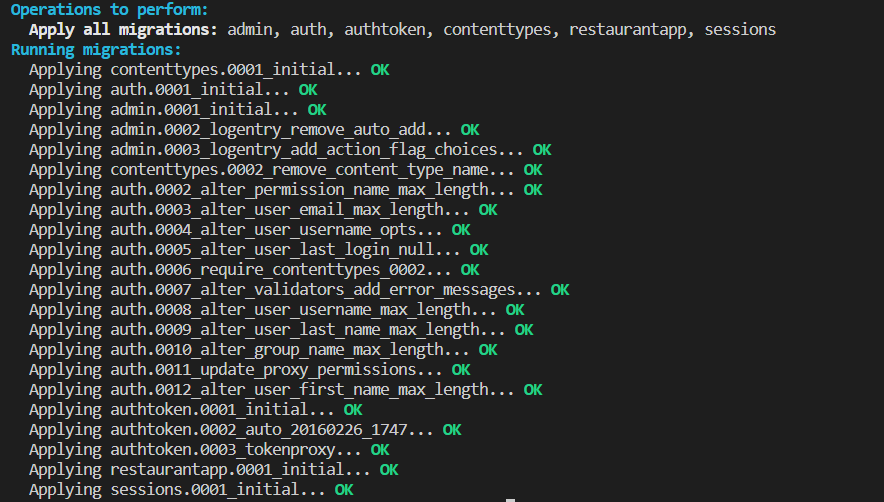
After running the migrate command, you should see something like this:
Creating serializers
Serialization is an essential concept in Django Rest Framework that allows us to convert model objects into more flexible data types like JSON. This helps to make our data more accessible to front-end frameworks and JavaScript, making it easier to work with.
Let’s create a new file serializers.py in the restaurantapp directory and add the following code:
from rest_framework import serializers
from .models import Snacks

class SnackSerializer(serializers.ModelSerializer):
class Meta:
model = Snacks
fields = ['id', 'name', 'price']
Earlier in the serializers.py file, we created a new class for our model serializer. This class allows us to define how our model objects should be serialized into more flexible data types like JSON.
Within this class, we added a Meta class, which is a standard part of Django Rest Framework's ModelSerializer implementation. The purpose of the Meta class is to allow us to define metadata about the serializer class, including the model we are creating a serializer for and the fields of the model we want to output. It is a good convention to create a separate serializer for creating and listing out objects, this is because in most cases, there are certain fields that we do not expect the client to input manually but we would return them when listing the objects but for the sake of this project, we will be using just one serializer class. DRF handles some of this conditional serialization automatically on fields such as ID, dates (with auto_add and auto_now_add), fields with read_only set to True etc.
Creating views and routes
In the previous sections, we created a model and serializer to format the output of our data properly. In this section, we will be creating a view for defining our API and a route.
In the views.py file in the app’s directory, add the following code:
from rest_framework.generics import CreateAPIView
from .serializers import SnackSerializer
from .models import Snacks

class SnackPost(CreateAPIView):
    serializer_class = SnackSerializer
    queryset = Snacks.objects.none()
In the code block above, we created views to create snacks as since we are not registering, Django will regard us as anonymous users and automatically pick the default throttle configuration for anonymous users which would be configured later on in this project.
Moving on, let’s create the routes for our APIs in the app’s urls.py file.
from django.urls import path
from .views import SnackPost

urlpatterns = [
    path('snacks', SnackPost.as_view()),
]
In the previous code block, we defined routes for our API views, which allowed us to map requests to the appropriate resources when requested on our browser. Now, we can implement throttling policies for our APIs globally to ensure that they are used efficiently and fairly.
To add throttling policies in Django Rest Framework, we need to define throttling classes in the settings.py file. These classes specify the rules for throttling, such as the maximum number of requests allowed per second or day.
Once defined, Django will automatically apply these throttling policies to all our API views, ensuring that our server remains responsive and available to all clients.
In the settings.py file, add the code as shown below:
REST_FRAMEWORK = {
'DEFAULT_THROTTLE_CLASSES': [
    "rest_framework.throttling.AnonRateThrottle",
    "rest_framework.throttling.UserRateThrottle",
],
"DEFAULT_THROTTLE_RATES": {
"anon": "2/min",
"user": "4/min"
}
}
In the code block above, we defined two throttle classes named UserRateThrottle and AnonRateThrottle. The UserRateThrottle is used to throttle requests from authenticated users in the app, using their user ID to generate a unique key for throttling. Meanwhile, the AnonRateThrottle is used to throttle requests from unauthenticated or anonymous users, using their IP address to generate a unique key for throttling.
The DEFAULT_THROTTLE_RATES dictionary sets the number of requests per time period for each type of user. The time can be specified as a minute, second, hour, or day.
To test this out, start the server by running the command below:
$ python manage.py runserver
Go to http://127.0.0.1:8000/restaurant/snacks and create some snacks.
On your third attempt in a minute, you should get a 429_too_many_requests error, along with a message indicating how long you need to wait before making additional requests.
However, in some cases, you may want to set different rate limits for different API endpoints or groups of endpoints. This is where scoped rate throttling comes in.
To use scoped rate throttling, we can set the default throttle class to ScopedRateThrottle in our Django settings. Then, in each view that we want to throttle, we can include a throttle_scope property that specifies the scope for that view.
In your settings.py file change the DEFAULT_THROTTLE_CLASSES and DEFAULT_THROTTLE_RATES to this:
REST_FRAMEWORK = {
    'DEFAULT_THROTTLE_CLASSES': [
    "rest_framework.throttling.ScopedRateThrottle",
],
"DEFAULT_THROTTLE_RATES": {
    "high": "30/min",
    "low": "5/min"
}
}
Then, in our view, we define the throttle scope for each view:
from rest_framework.generics import ListAPIView, CreateAPIView
from .serializers import SnackSerializer
from .models import Snacks


classSnackPost(CreateAPIView):

    serializer_class = SnackSerializer
    queryset = Snacks.objects.none()
    throttle_scope = "low"

classGetSnacks(ListAPIView):

    throttle_scope = "high"
    serializer_class = SnackSerializer
    queryset = Snacks.objects.all()
Using separate throttle classes for each view, you can set different throttling restrictions for each endpoint. In this example, the SnackPost is restricted to 5 requests per minute, while the GetSnacks is restricted to 30 requests per minute. If a client exceeds these limits, they will receive a 429 Too Many Requests error.
Security Limitations of Rate Limiting
While rate limiting can enhance security, it also has some limitations that can affect the overall security of a system. Here are some security limitations of rate limiting:
Limited protection against sophisticated attacks: While rate limiting can prevent or mitigate basic DDoS attacks, more sophisticated attacks such as application layer attacks can bypass rate limiting by simulating legitimate traffic or using distributed sources.
Difficulty in distinguishing between legitimate and malicious traffic: Rate limiting relies on traffic patterns to distinguish between legitimate and malicious traffic. However, this approach can be ineffective if attackers use various techniques to simulate legitimate traffic.
Inadequate protection against slow-rate attacks: Slow-rate attacks are designed to bypass rate limiting by sending requests at a slow rate over a long period. As a result, rate limiting may not be able to detect or prevent such attacks.
CONCLUSION
In this article, we discussed API rate limiting as an essential technique to prevent abusive usage of APIs and ensure that they remain performant and available for all users. By imposing limits on the number of requests that clients can make within a given time, API providers can protect their services from excessive traffic, denial-of-service attacks, and other forms of abuse.
Furthermore, we explored how to implement rate limiting in Django using the built-in throttle middleware. We learned how to define throttle scopes for different views and set different rate limits for each scope. By using Django's SimpleRateThrottle class, we were able to easily enforce rate limits and return appropriate HTTP status codes when clients exceeded them.
Lastly, we delved into the limitations of rate limiting as it is germane to note that even though rate limiting can enhance security, it is just one part of a comprehensive security strategy and must be combined with other security measures as it is not enough to stop more sophisticated attacks.
Ultimately, the choice of rate limiting strategy will depend on the specific needs of your API and your infrastructure. But by implementing some form of rate limiting, you can help ensure that your API remains reliable, available, and performant for all users.


